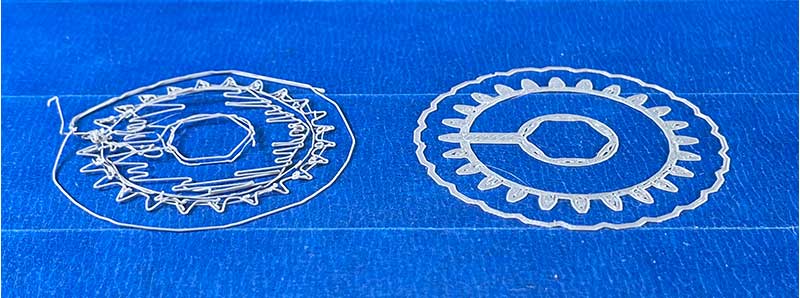
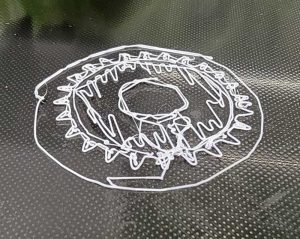
As the foundation for the entire 3D print, the first layer has a big job to do. Even experienced 3D printer users know how challenging it is to get the first layer right. One of the most common causes of a bad first layer is the part not sticking to the print bed. Improving surface adhesion can make all the difference between a spaghetti-like mess and a great print. In this article, we share five easy ways to ensure a print sticks to the bed for a perfect first layer every time.
1. Level the Bed
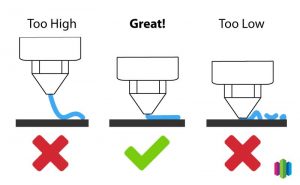
An uneven print bed is often to blame for a print that doesn’t stick. This issue occurs when the print bed (also known as the print surface, build surface, or build platform) doesn’t maintain a consistent distance with the nozzle across the entire bed. If the build platform isn’t flat and level, the nozzle will be too close in some places and too far away in others. Even if the build platform is perfectly level, it can still be set too far away or too close to the nozzle.
Each printer has a very specific way to accomplish bed leveling. Some manufacturers utilize springs and screws, while others automate the process entirely using bed-leveling sensors. Consult your printer’s owner’s manual for its specific bed leveling technique. Don’t skip this step! It is critical to the success of your first layer.
2. Slow Down First Layer Speed
Getting a print to stick to the bed is difficult if the tool head moves too quickly. Slowing down the print speed will allow the extruded plastic to bond better to the print bed.
Simplify3D offers a dedicated setting for controlling the first layer speed. This maximizes first layer adhesion without slowing down subsequent layers of your print. To adjust the first layer speed in Cloud 3D Print. We recommend reducing your first layer speed by 30% – 50%.
3. Check the Temperature
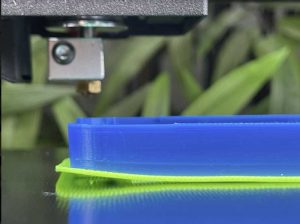
If the first layer sticks but later separates from the print bed, temperature settings are the likely reason. In many cases, the toolhead extrudes filament at the optimal temperature but the platform is not warm enough.
If your printer has a heated build platform, increasing the bed temperature might improve adhesion. We recommend increasing the bed temperature in 5-degree increments until you are able to print a perfect first layer.
If you have increased the temperature by more than 10 degrees and the first layer still isn’t sticking, review the other steps in this article. Bed temperature is probably not the issue.
Also, check the filament you are using. Filament typically comes with a recommended extruder and bed temperature range from the manufacturer.
4. Treat the Build Surface
If following the above steps doesn’t fix your first layer woes, cleaning the build surface might help. Sometimes, the first layer peels away from the build surface because it is dusty, greasy, or oily. Be sure to wipe down the build surface regularly with some isopropyl alcohol (IPA) to remove any contaminants.
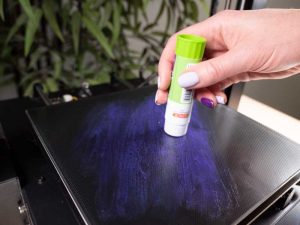
Different filaments will also adhere better to certain build plate materials, but fail to stick to others. Many users benefit from applying one of the following to the bed:
- Glue stick: We recommend a standard Elmer’s glue stick.
- Hairspray: Aqua Net is a popular choice.
- Painter’s tape: It can be helpful to buy extra wide painter’s tape so you don’t have to use many strips. Avoid overlapping the strips of tape.
- Specialized surface material:
- BuildTak: A stick-on sheet made of heat-resistant material provides good adhesion for most materials.
- Polyetherimide (PEI) sheet: This specialized plastic sheet is glued to the build plate. It is effective for all filament types.
5. Add a Raft, Skirt, or Brim
If you have read through the sections above but are still having issues, Cloud 3D Print’s integrated slicer has some helpful features. The software includes built-in options to create sacrificial structures around the first layer of the print. These temporary add-ons are specifically intended to help with first-layer adhesion. They can be easily removed and thrown away after the print is finished.
- Rafts: A horizontal latticework of filament that is printed underneath a part for better first layer adhesion.
- Skirts: An outline that surrounds a part but doesn’t touch it. The skirt is extruded on the print bed before the model starts printing. This helps prime the filament.
- Brims: A special type of skirt (that looks like the brim of a hat) that is attached to the edges of a model. Brims help prevent warping and improve bed adhesion.
Getting the first layer right is critical to the success of the rest of your print. While first-layer adhesion problems are frustrating, many can be eliminated with a level bed, correct temperatures, slower speeds, and proper bed preparation.